Creating Access Rule
To create an access rule:
- Select Business rules → Settings → Booking access in the main menu. The searching form of booking access will be presented.
- Perform rule search by specified criteria.
- Click Add rule in the top right part of the screen. The access rule creation form will be presented.
Assigning the Where parameters
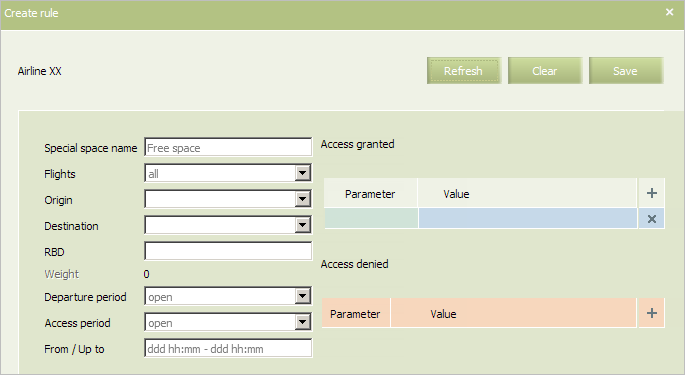
In the left part of the screen, specify values of the Where parameter in the following fields:
- Special Space Name: a name of a sales area. The default value is Free. It means that a rule is created for a free sales area on flights.
- Flights: flight numbers. A rule is created to these flights. It is acceptable to specify a list of flight numbers separated by commas and/or a range of flight numbers separated by a hyphen.
- Origin: a point of departure (port, not city!).
- Destination: a point of destination (port, not city!).
- Weight — rule weight is automatically calculated and displayed in this field;
- RBD: a range of booking classes.
- Departure period: a departure period.
- Access period: a booking access period.
- From / Up to: period before departure within which a rule is applied. This parameter is specified as two sets of number of days, hours and minutes before departure. E.g. 010 15:20 is for 10 days, 15 hours and 20 minutes before departure.
| From / Up to parameters is for specification of access period relative to flight departure. So From / Up to period should me more specific than Access period parameter. |
A set of these parameters will define booking access on the selected flights to be granted for the entries, specifies in the Whom set.
Assigning the Whom Parameters
In the right part of the screen, specify values of the Whom parameter.
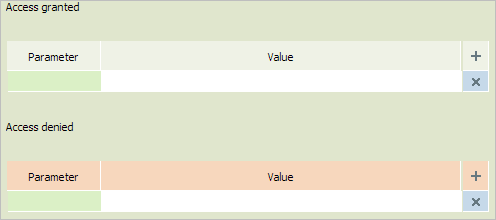
The Access granted and Access denied lists are presented in this window. They are used to form lists of units with open and closed access.
To add a value to the list, click ![]() in an appropriate section. The field for filling in values will be presented.
in an appropriate section. The field for filling in values will be presented.
Select unit in the Parameter drop-down list:
| Parameter | Comment |
|---|---|
| POS Group | The choice from the POS group list which is previously specified in the POS group directory |
| ALL | All units |
| System | Booking system |
| Language | Language |
| Currency | Currency |
| Country | Country |
| Location | Location: city or airport (depending on which of these parameters was used in the telegram).
For cities with only one port select a port, for cities with multiple ports select a port or a city. For the parameter values, there is the option of horizontal scrolling for the field elements. After the rule is saved, the value list is sorted in alphabetic order: first are airports, next are cities. To delete a value from the list, select it and press the Delete button on your keyboard |
| Agency type | А - airline, T - agency |
| Agency | Agency code when booking from GDS Amber |
| IATA ID | Specify POS for bookings from GDS Amber. For other bookings, specify IATA ID/ ERSP/1H agency ID |
| Inhouse ID | ID used to identify travel agency office within the System (PCC, Office ID, etc.) |
| CLID | Client ID — ERSP. Unique code of online agency user |
| Terminal ID | Used for access restriction only |
| Agent duty | Used for access restriction only |
| Combination | Combination of units |
| These settings will work only if telegrams from external system contain the corresponding parameter values. |
Specify a value of the selected unit in the Value list.
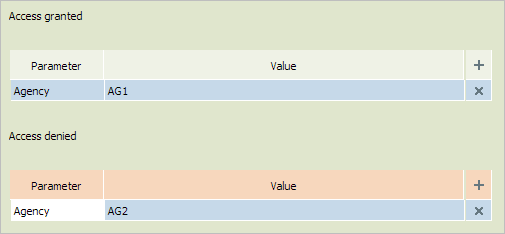
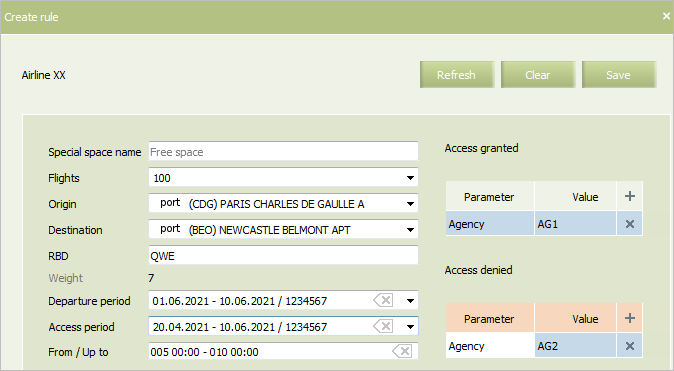
On a figure below there is an example how to grant access for agency AG1 and deny access for agency AG2.
The following parameters are set for this access rule:
- for a flight number XX-100,
- which is operated on the route from airport CDG to airport BEO,
- on dates between 01.06.21 and 10.06.21 (DD.MM.YYYY)
- on all days of week,
- booking access is granted for agency AG1
- booking access is restricted for agency AG1
- this access settings are valid for booking classes QWE
- starting from 20.04.21 and till 10.06.21 (DD.MM.YYYY)
- this rule is applied 10 days before departure and is cancelled 5 days before departure.
Click Save. The access rule will be saved in the System and displayed on the screen.


