Working with outgoing messages
To view the outgoing messages, select the flight and click on the Outgoing/F5 button. The list of outgoing messages will open. The list of messages is automatically updated every 5 minutes; to update it manually, click on the Outgoing/F5 button.
The Outgoing Messages window description:
- Flight information
- Flight/F2 – airline designator and flight number, additionally the departure date and airport can be indicated (depending on settings).
- Aircraft – aircraft type designator according to the aircraft index.
- Board – board number.
- Park – aircraft parking place number.
- Layout – layout designator of this flight.
- Route – codes of destination points after the base airport according to the city index.
- Departure – time of departure.
- Type – flight type.
- Status – flight status.
Additional info may be displayed below the Flight info area.
The list of messages
The list of generated messages will be shown in the left area of the screen, with indication of their type and time of dispatch. Dispatched messages are highlighted in color.
- Type - message type
- Dispatch – time and date of message dispatch
- Add. info – additional information (mandatory attribute of message dispatch). Depends on the message type:
- PFS – reservations system code (according to the Reservations Systems Index)
- PTM, BTM – code of airport on the route (according to the Airports Index)
When the cursor is placed on the row with a particular message, the text of the message will be displayed in the right area of the window.
Message text
Message text is generated in accordance with the IATA standards; there is particular standard for each message type.
The text area is divided into three areas:
- Header – the addresses of the sender and recipient, message type
- Message body – text of the message (for LDM, MVT messages and free format messages accessible for editing)
- Message end – final line of the message.
Functions of the Outgoing Messages screen buttons
- Save to disk/Ctrl+F9 – save the message on the computer hard disk
- Print/(Alt)+F12 – print out the current message or set up the printer (printing setup is described in detail in the General Provisions)
- New/F7 – generating a new message
- Delete/F8 – delete a message
- Save/F9 – save changes after editing of the message text
- Dispatch/F11 – dispatch a message
- Addresses/F6 – open the Message Addresses Table (described in detail in the System Administrator Instruction)
- Exit/Alt+X – exit from the Module
- Clear/Esc – clear the screen (reset information)
- Load MSG/F3 – load a message from the disk
- Incoming/F4 – view the incoming messages for the flight
- Outgoing/F4 – view the outgoing messages for the flight or update the information about outgoing messages.
Generating an outgoing message
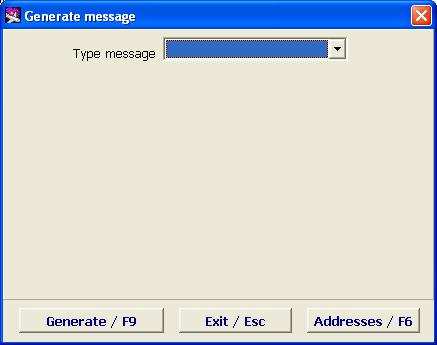
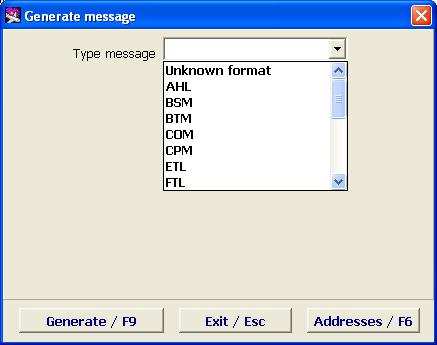
Many types of messages are generated automatically, depending on the rules set in the system. To manually generate a message, click on New/F7 button on the Outgoing Messages screen (Figure 7), the window for new message creation will open (Figure 8).
Message Type – a drop down list to select a message type.
When a message type is selected, the form for this message type will open. This form will contain additional range of criteria for proper message generating:
Numeric message – indicates that a numeric message is being generated (active only for PFS and PTM messages)
Airport – code of the airport to which the message should be sent (to be selected from the drop down list containing the stations of a particular flight), active only for PFS and PTM messages
Reserv. System – reservations system code for sending the message (can be selected from the Reservations Systems Index), active only for PFS messages
Marketing Flight — to be specified in case of generating a message for a code share flight
Flight in Header - to be checked in case of a message for a marketing flight.
Encoding – type of encoding:
Combined – passenger names, PNR numbers, etc., will be included in the message as is - as they were entered into the system
Latin – passenger names, PNR numbers, etc., containing non-Latin letters, will be transformed (reference data codes into the Latin reference data codes, passenger names and free text will be transliterated, PNR numbers containing Cyrillic letters will be omitted)
If the message is intended for sending via SITA network channels, it is necessary to select only Latin coding otherwise it's not guaranteed that the addressee will receive the message.
Destination Addresses – list of seven-digit SITA addresses separated by spaces (type the address or select it in the Message Addresses Table, to do this, place the cursor in this field and press (F1). If not filled in, the addresses will be automatically taken from the Message Addresses Table or, if not available there, you will be notified about it.
Description of the Generate Message window buttons
Generate/F9 – generate a message
Exit/Esc – exit the window without generating the message
Addresses/F6 – open the Message Addresses Table to view (described in the System Administrator Instruction)
Editing the message text
It is possible to edit the text of the LDM, MVT and free format messages; the edit box is located in the middle area of the message view window (Fig. 4). If necessary, it may be amended and after that deliberately saved by clicking on Save/F9.
Dispatch of messages
Messages generated automatically will be immediately automatically dispatched. Messages generated manually must be sent by clicking on Dispatch/F11. The dispatched message will be highlighted in dark blue in the list of messages.
Deleting messages
To delete a message, place the cursor on this message in the list of messages and click on Delete/F8. The system will require confirmation, and after the confirmation the message will disappear from the list. Only not dispatched messages may be deleted.

